Showing posts with label Revit 2013. Show all posts

Tuesday, December 4, 2012

New Publication

Some of you may have heard about a small .NET publication I've been working on. Well... it has been published and you can get your very own copy! Don't read too much into the image on the cover ;)

It's a cookbook style how-to book packt with loads of code samples suited for developers of just about any experience level.

http://www.packtpub.com/customizing-autodesk-revit-2013-with-net/book


Wednesday, September 19, 2012

Getting all File Based Family Elements by Category

I haven't shared any code on here in a while and thought this might be a good time to get back in the general sharing mode. I get asked a bunch about how the best way is to collect elements in the model especially file based component families (FamilySymbol).

This sample should work in Revit 2012 as well as Revit 2013.

Here's a quick and easy way to get all elements in your model of FamilySymbol organized by Category. We'll use a basic Dictionary class to hold the elements since Dictionaries are super fast to access values from without any iteration required.

First you will need to declare your dictionary somewhere in your code as either a private or public property (you decide), I'm using a property in this example.


  ''' <summary>
  ''' All Family Symbol Elements in the Model by Category
  ''' </summary>
  ''' <value></value>
  ''' <returns></returns>
  ''' <remarks></remarks>
  Public Property FamilySymbolElements As Dictionary(Of Category, List(Of FamilySymbol))


The next thing is to provide a subroutine where you can perform the gathering of the elements. After we instantiate a fresh dictionary to hold the data, we build a filtered element collector that collects elements by their class type. The class type we're interested in is FamilySymbol.

We then iterate over the elements returned by the collector and check if the category that the element belongs to is in our dictionary. Where the category does not exists as a key in our dictionary, we add a fresh list containing the single element. Where it already exists, we get the list containing the elements and add the new element to the list and apply the updated list back as the value to the dictionary for that category.


  ''' <summary>
  ''' Get all Family Symbol Elements
  ''' </summary>
  ''' <remarks></remarks>
  Private Sub GetSymbols()
 
    ' Fresh Dictionary
    FamilySymbolElements = New Dictionary(Of Category, List(Of FamilySymbol))
 
    ' Collector
    Using col As New FilteredElementCollector(Doc)
      col.OfClass(GetType(FamilySymbol))
      For Each x In col.ToElements
 
        Try
 
          ' Cast and Collect
          Dim m_fs As FamilySymbol = TryCast(x, FamilySymbol)
 
          ' Does the Category already exist in the system
          Dim m_cat As Category = x.Category
          If Not FamilySymbolElements.ContainsKey(m_cat) Then
 
            ' New List
            Dim m_l As New List(Of FamilySymbol)
            m_l.Add(m_fs)
            FamilySymbolElements(m_cat) = m_l
 
          Else
 
            Try
 
              ' Updated List
              Dim m_l As New List(Of FamilySymbol)
              FamilySymbolElements.TryGetValue(m_cat, m_l)
              m_l.Add(m_fs)
 
              ' Update the Key
              FamilySymbolElements(m_cat) = m_l
 
            Catch ex As Exception
 
            End Try
 
          End If
 
        Catch ex As Exception
 
        End Try
 
      Next
    End Using
 
  End Sub


Now we have a complete list of FamilySymbol elements in the model organized by category.

Tuesday, July 3, 2012

Hands on Revit API Training Workshops

Updated July 6, 2012!


I've got some good news for those of you interested in learning the Revit API. I will be conducting a series of hands-on workshops at the CASE office in New York (401 Broadway). These workshops will max out at ten (10) attendees. You will leave this workshop capable of developing your own add-ins.

Content will be tailored for beginner programmers that have familiarity with Revit. If you are a designer or support designers and have some sort need to learn BIM automation, this workshop is for you.

MacBook Airs loaded with all necessary software will be provided for your use during the workshops... just show up and be ready to learn!


View


Hardware
MacBook Airs
.NET

When?

Look for an official announcement later this month with the first workshop being held some time in August.

Length of Workshop?

We anticipate the workshop running 4 days with each session day running six hours with an hour long break in the middle (9am to 4pm).

Talent Assumptions / Prerequisites

  • Attendees will have basic knowledge of the Revit platform
  • Attendees have at least hear of the Revit API and have heard of the Microsoft .NET Framework

Programming Languages Used in Workshop

  • C# and VB.NET

Cost?

The cost for the workshops is yet to be determined. Stay tuned for announcements from the www.case-inc.com site.

Want to Reserve a Spot Now?

  • Leave a comment at the bottom with your name
  • DM or @ me on Twitter: AYBABTM

Friday, April 27, 2012

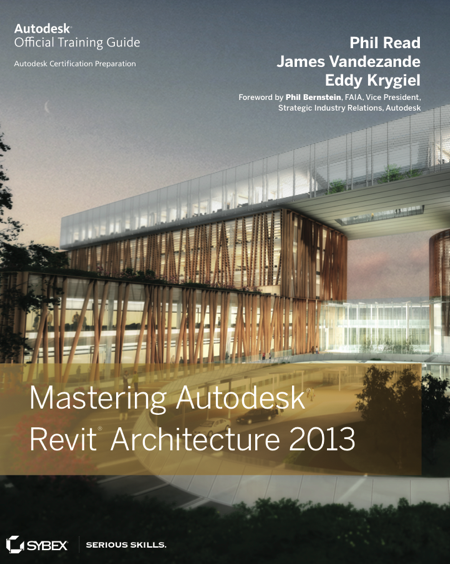
Mastering Autodesk Revit Architecture 2013

If you haven't made it over to Amazon to preorder your copy of the official Autodesk Revit Architecture 2013 training guide entitled "Mastering Autodesk Revit Architecture 2013" then you better go do it now...


This was my third year writing the API chapter with Phil Read, James Vandezande, and Eddy Krygiel. I wrote about the "Extrude Rooms to 3D Mass" sample that everyone seems to love so much. This sample was first released on the Case Design, Inc. free Revit Add-ins page. Now you have the opportunity to see the code and get an in-depth glimpse as to how this API sample works.

You can access the official API Sample exactly as it was used in the chapter from the main Sybex website. I will also be posting the sample to github (after the book officially publishes) where we can make updates if we need to. The sample was written in VB.NET, but a C# version may eventually get pushed into the github repo as well.

Wednesday, April 25, 2012

Revit API 101.2

The topic for this post will be centered on the .addin manifest file and how Add-Ins get loaded into the Revit session. The schema or file organization of the .addin file format will be discussed at first and then I'll explain a little bit about the options you have for configuring the manifest file up so that it loads the resources necessary for your tool to run automatically during debug.

Sorry if you've been hoping for a video, but this kind of information is best absorbed through good old fashioned black and white. And as far as language examples, these concepts are virtually identical between C# and VB.NET.

What is the .addin Manifest File?

For those of you that have experience using Revit Add-Ins in versions prior to Revit 2010, you may remember the old cryptic method of loading an Add-In by editing the Revit.ini file. The old Revit.ini method of loading Add-Ins into Revit is now obsolete and replaced by what is referred to as a manifest file. Manifest files are XML formatted ASCII files that tell Revit where the Add-In resources are and what class that the required IExternalApplication, IExternalCommand, or IExternalDBApplication interface has been implemented so that Revit can load the necessary commands and functionality into the session.

Revit searches for .addin files in two locations. The directory paths shown here are for Windows 7. Replace the YYYY in the paths below to match your Revit 2010 or higher installation versions (2010, 2011, 2012, 2013, etc.).

Constant for all users on the machine (may require admin permissions to modify)
  • C:\ProgramData\Autodesk\Revit\Addins\YYYY
Current user logged into Windows only (does not require admin permissions to modify)
  • %USERPROFILE%\AppData\Roaming\Autodesk\Revit\Addins\YYYY

Required Manifest Tags

There are slightly different requirements between command and application load manifests and quite a few optional tags that you can utilize in your .addin manifest files. This section will focus on the required tags. First I'll outline the required tags that are consistent for both application and command loading manifests and then the one tag specific to application load sequences.

Assembly (Required all All)
This tag is required for all kinds of applications and commands. It must contain the full file name to your DLL file. It is only required to contain a full path to the DLL if the DLL does not exist within the same directory as the .addin file. Relative pathing is supported by entering ".\" before the file path and or name so long as the directory is located beneath the same directory that the .addin file resides.

ClientId (Required for All)
A complete and fully qualified global unique identifier is required in this tag. This GUID needs to be unique across all other application or command ClientId's loaded in your session.

FullClassName (Required for All)
This is where you would enter the namespace(s) followed by the class name that contains the command or application interface that you want to execute or load. This tag should never have any spaces contained in it.

VendorId (Required for All Revit 2012 and Higher)
The four digit registered developer ID that can be obtained from the ADN site to identify the developer.

VendorDescription (Required for All Revit 2012 and Higher)
An explanation or description for the developer. It is common to list the company name and or the web address to a support site that relates to the tool.

Name (Applications Only)
A unique name for the application.

A Sample Manifest File

As you can see in the sample .addin file below, it is possible to nest multiple command and applications load sequences into a common .addin file. A sample application load sequence is loaded first with a command after it. The important thing to remember when combining multiple command or application loads is that they are all nested inside a single "RevitAddIns" tag.

<?xml version="1.0" encoding="utf-8"?>
<RevitAddIns>
  <AddIn Type="Application">
    <Name>Application Name</Name>
    <Assembly>Namespace.dll</Assembly>
    <ClientId>4ea76ff3-bba7-4969-9371-c7a3eb8ac0a8</ClientId>
    <FullClassName>Namespace.Class</FullClassName>
    <VendorId>XXXX</VendorId>
    <VendorDescription>Something about the developer, Link</VendorDescription>
  </AddIn>
  <AddIn Type="Command">
    <Text>My Command Name</Text>
    <Description>Example Command Description</Description>
    <Assembly>Namespace.dll</Assembly>
    <FullClassName>Namespace.CommandClass</FullClassName>
    <ClientId>9db2c58d-33f2-4ad1-8932-329dd83a4d0a</ClientId>
    <VendorId>XXXX</VendorId>
    <VendorDescription>Something about the developer, Link</VendorDescription>
  </AddIn>
</RevitAddIns>

Automatic Copying of a Solution Manifest to Install on Debug

You can have your .addin manifest copied to your .addins load directory automatically while debugging in Visual Studio by setting a post build event. This requires that your .addin file exist in the root of your project and included within your project's solution. An example on where and how to enter this to work on a Visual Basic .NET example is shown below.


Note: If you left out a file path to your assembly (file name only), you will be able to debug from your debug directory location during debug mode as well as run the main DLL in your Add-In load directory using the same manifest file. You will need to adjust command below to match the Revit version year and .addin file name as required. Just remember, you will need to include your .addin file withini your Visual Studio solution for this trick to work.


copy "$(ProjectDir)MyAddinFile.addin"
"$(AppData)\Autodesk\REVIT\Addins\2012\MyAddinFile.addin"

Thursday, April 19, 2012

Revit API 101.1

This is yet another installment of the ongoing Revit API 101 installment that can be viewed in numeric order from 101.#. Each are free so long as you agree to buy the writer a beer when you next see him: @AYBABTM (Austin, TX or next conference/gathering). While some basic understanding of .NET terminology and understanding is assumed in these posts, you'll do just fine if you follow the images and explanations.

I'll attempt to keep the posts slim and to the point, so if you have questions, please post them in the comments. Just remember, there's no crying in .NET.

The Revit API Namespaces

There are two DLL references that make up the entire Revit API, only one of which is required for all Revit API projects.

  • RevitAPI.dll                     (required for all Revit API projects)
  • RevitAPIUI.dll                 (required to access the application user interface objects)

The Required Transaction Attribute for All Revit API Class Implementations

There is now only one required API attribute implementation required for all Revit API implementations. The TransactionMode attribute needs to always be set immediately above the main class declaration as shown below. The TransactionMode attribute informs the Revit API as to how the pass or fail is handled for any given attempt to make changes to a Revit document using the Revit API. There are three settings for the TransactionMode attribute. The Automatic option is soon to be Obsolete, so that really only leaves two valid settings to chose from. The read-only setting is just that, so if you need to make changes to a model document, you should set your transaction attribute to Manual. We'll get into how to build and manage transactions in a future post.


The Revit API Implementations (3)

There are three ways to gain access to the .NET Revit API customization environment. The IExternalcommand implementation is by far the most common and will be discussed in our first real code example. The IExternalApplication interface is the second type and is used either to gain access to the IExternalCommand functions or events (document or application). The third and less common implementation is the IExternalDBApplication implementation which is similar to the IExternalCommand interface except that it cannot access any of the RevitAPIUI.dll namespaces.


The sample API Templates demonstrate implementations of the IExternalCommand interface in the Command class as well as the IExternalApplication interface in the Application class. The IExternalDBApplication class is similar to the IExternalApplication class except for minor differences as shown below.

Sample IExternalCommand Interface


Imports Autodesk.Revit.ApplicationServices
Imports Autodesk.Revit.Attributes
Imports Autodesk.Revit.DB
Imports Autodesk.Revit.UI
Imports Autodesk.Revit.UI.Selection

''' <summary>
''' Revit 2013 Command Class 
''' </summary>
''' <remarks></remarks>
<Transaction(TransactionMode.Manual)>
Public Class Command

    Implements IExternalCommand

    ''' <summary>
    ''' Command Entry Point
    ''' </summary>
    ''' <param name="commandData">Input argument providing access to the Revit application and documents</param>
    ''' <param name="message">Return message to the user in case of error or cancel</param>
    ''' <param name="elements">Access elements</param>
    ''' <returns>Cancelled, Failed or Succeeded</returns>
    Public Function Execute(ByVal commandData As ExternalCommandData,
                            ByRef message As String,
                            ByVal elements As ElementSet) As Result Implements IExternalCommand.Execute
        Try
            ' Add Your Code Here

            ' Return Success
            Return Result.Succeeded

        Catch ex As Exception

            ' Failure Message
            message = ex.Message
            Return Result.Failed

        End Try

    End Function
End Class

Sample IExternalApplication Interface


Imports Autodesk.Revit.ApplicationServices
Imports Autodesk.Revit.Attributes
Imports Autodesk.Revit.DB
Imports Autodesk.Revit.UI
Imports Autodesk.Revit.UI.Selection

''' <summary>
''' Revit 2013 API Application Class
''' </summary>
''' <remarks></remarks>
<Transaction(TransactionMode.Manual)> 
Class Application

    Implements IExternalApplication

    ''' <summary>
    ''' Fires off when Revit Session Starts
    ''' </summary>
    ''' <param name="application">The UI controlled application</param>
    ''' <returns>Returned status</returns>
    Public Function OnStartup(ByVal application As UIControlledApplication) _
            As Result Implements IExternalApplication.OnStartup

        Try

            ' Add your code here

            ' Return Success
            Return Result.Succeeded

        Catch ex As Exception

            ' Return Failure
            Return Result.Failed

        End Try

    End Function

    ''' <summary>
    ''' Fires off when Revit Session Ends
    ''' </summary>
    ''' <param name="application">The UI controlled application.</param>
    ''' <returns>Returned status</returns>
    Public Function OnShutdown(ByVal application As UIControlledApplication) _
            As Result Implements IExternalApplication.OnShutdown

        ' Return Success
        Return Result.Succeeded

    End Function

End Class

Sample IExternalDBApplication Interface


Imports Autodesk.Revit.ApplicationServices
Imports Autodesk.Revit.Attributes
Imports Autodesk.Revit.DB
Imports Autodesk.Revit.UI
Imports Autodesk.Revit.UI.Selection

''' <summary>
''' Revit 2013 API DBApplication Class
''' </summary>
''' <remarks></remarks>
<Transaction(TransactionMode.Manual)>
Public Class DBApplication

    Implements IExternalDBApplication

    ''' <summary>
    ''' DB Application Shutdown
    ''' </summary>
    ''' <param name="application">The controlled application</param>
    ''' <returns>Returned status</returns>
    ''' <remarks></remarks>
    Public Function OnShutdown(application As ControlledApplication) _
            As ExternalDBApplicationResult Implements IExternalDBApplication.OnShutdown

        ' Return Success
        Return Result.Succeeded

    End Function

    ''' <summary>
    ''' DB Application Startup
    ''' </summary>
    ''' <param name="application">The controlled application</param>
    ''' <returns>Returned status</returns>
    ''' <remarks></remarks>
    Public Function OnStartup(application As ControlledApplication) _
            As ExternalDBApplicationResult Implements IExternalDBApplication.OnStartup

        Try

            ' Add your code here

            ' Return Success
            Return Result.Succeeded

        Catch ex As Exception

            ' Return Failure
            Return Result.Failed

        End Try

    End Function

End Class

Tuesday, April 17, 2012

Revit API Training 101.01

I've been getting lots of requests from folks to post a "Getting Started with the Revit API" or "Revit API 101" series, so here is the introduction to such a series! I better see lots of views on these posts! Don't let me down.

Sample Code on GitHub

I've setup a git repository for you guys to download the source code for the samples (as they become available). Revit API 101 Samples on GitHub: http://github.com/rudderdon/Revit101 .

Introduction

This is the first of what might be an endless series on how to get going with the Revit API. Since Revit 2013 just came out, these topics will focus on 2013. If Revit 2012 is all that you have installed, don't worry. The Revit 2012 and 2013 API's differ only slightly and I'll do my best to point out what is different between the two versions in my posts as we run into those differences.


Getting Started, the Development Environment

The first thing that I would recommend for someone that is bran spanking new at programming altogether would be to download and install an Integrated Development Environment (IDE) suitable for .NET development. The Application Programming Interface (API) for Revit is based on the Microsoft .NET Framework 4.0. There are several free IDE platforms out there that you can use, but if you have access to or can afford it, I recommend Microsoft Visual Studio Professional (VS). The latest official versions of VS at the time of this post is VS 2010. There is a free BETA version for 2011 out that you can use, but it will stop working later in the summer of 2012 unless you purchase a license.

Download and Purchase VS 2010 Professional
Download VS 2011 BETA
Download VS 2010 Express Versions (FREE)

Other non Microsoft Sanctioned .NET IDE's
SharpDevelop (Free)
MonoDevelop

Download and Explore the Revit SDK

The Software Development Kit for Revit contains several samples as well as key documentation that can keep you moving in the right direction. The 2012 SDK has a lot more samples than the 2013 version, but you can download either from the Autodesk Revit website. You can also read through Autodesk's tutorial entitled "My First Revit Plug-in."


The next post will cover the Revit API implementations and how they work. We will also have our first sample piece of code to work with.

Friday, April 6, 2012

Revit 2013 Visual Studio 2010 Template

For those of you that also write Add-Ins for Revit, I went ahead and posted an updated template for Autodesk Revit Architecture 2013. I've included links to a VB.NET and C# template below.
Installing VB.NET
Copy this zip file as-is (do not unzip it) into a directory beneath
"%USERPROFILE%\Documents\Visual Studio 2010\Templates\ProjectTemplates\Visual Basic" 

Installing C#
Copy this zip file as-is (do not unzip it) into a directory beneath
"%USERPROFILE%\Documents\Visual Studio 2010\Templates\ProjectTemplates\Visual C#" 

The next time you launch Visual Studio 2010, you will notice a new project template named "Revit Architecture 2013 Template" in the directory's name you placed it under kinda like what you see below.