Monday, June 28, 2010

Custom Electrical Panel Schedules??

Look for an updated post on this topic coming March 2011!... this post is very brief and doesn't contain much detail at all:...

This isn't quite dealing with any API, but notable nonetheless...

Perhaps one of the biggest reasons for electrical designers to upgrade to Revit MEP 2011 is the introduction of a fully customizable panel schedule management system. This may not sound like much, but in previous versions of Revit it wasn't even possible to show load classifications as well as several other information required by various jurisdictions. Those days are over...

Not only can you create and manage custom load classifications, but you can show them in your panel schedules if you choose! It is also possible to manage several different panel schedule templates and apply the one you choose to whatever panel schedule you want in your project independently!!
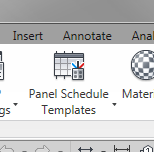
Panel Schedule Templates are managed from the "Panel Schedule Templates" button in the "Manage" tab of the ribbon.

This is where you get access to edit the format of the templates as well as apply the templates to the panels that live in your current project.
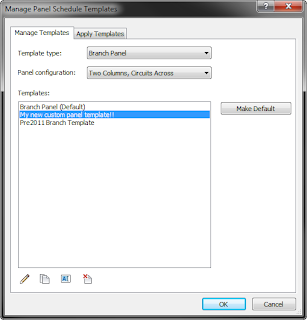
Selecting the "Manage Templates" button takes me to a dialog that I can duplicate, edit, create a new, or delete a panel schedule template. As you can see in the image to the right, there are various options for template type, configuration and along the top there is another tab to apply certain templates to panels that exist in my project.

Launching the edit mode for a panel schedule template will present a new mode for Revit where you can edit the arrangement and inclusions for your panel schedule data. You can actually control the font (type, size, style, and color) for each cell individually!

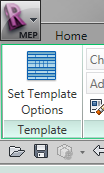
It is possible to add and remove columns and rows wherever you want them. You can also manage the display of the load cells by phase by picking the "Set Template Options" button while in the "Modify Panel Schedule Template" mode.
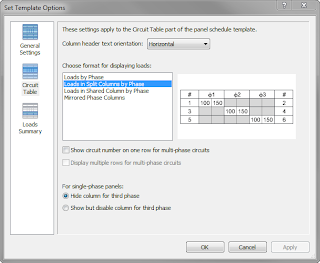
The options to set include the overall panel schedule width, quantity of circuit slots shown, display of header/load summary/footer, and the border styles used. There are also options under the "Circuit Table" options to control the display of the phase load cells per circuit. When a single-phase panel is active, there is an option to hide the third phase columns as well.

It is also possible to merge and unmerge cells, postcalculated values to a cell, adjust unit formats for a cell, individually manage borders for cells... the list goes on...

It is finally possible to display and document panel schedule information in a useful manner in Revit MEP!!

Friday, June 25, 2010

Autodesk University 2010

I submitted one Autodesk University class proposal back in May entitled "Leveraging the Tail End of the BIM Lifecycle with API" as a one hour lecture and was informed today that it was one of only 600+ classes accepted from the almost 3,500 proposals!!

The class track is centered around API but will also touch on various tips for configuring a Revit model for uses relating to facility management operations.

Target Audience:
Facility Managers, Developers, Project Managers, Building Owners

Thursday, June 17, 2010

Revit Addin Manifest Tips and Tricks (debug AND normal load)

If the code below looks jacked up, stretch out your browser window...


While updating my employer's Revit 2010 utilities to 2011, I've stumbled upon some interesting behavior with the new add-in manifest files. I've discovered that if I do not include a file path in the tag of the manifest file that I can accomplish both debugging from Visual Studio 2008 as well as natural loading all with a few simple bits of code...

Prior to discovering this, I was using a separate 'DEBUG' manifest file pointing to my debug directory for the Visual Studio 2008 project and a separate 'PRODUCTION DISTRIBUTION' manifest file that pathed to the normal 'addin' directory for my tools to load into Revit 2011.

In order for this example to work, the add-in manifest file still needs to be located in the normal 'Addin' directory in order to load into Revit, but if I start my application from Visual Studio 2008 in debug mode, I have full access to my [target.DLL] even though my [target.DLL] is not loaded in the same directory as the default add-in directory. This may sound confusing, but actually works quite well in that it suites dual purpose:

When I fire up Revit, the DLL saved in the add-in directory is loaded into Revit. When I start Revit from Visual Studio to debug an application, the DLL in my Visual Studio debug directory is loaded into the Revit session.

Here's how I do it for a sample application that loads external DLL command files (the command files must be present in the same directory as the main application DLL being debugged for this example to work):


Imports Autodesk.Revit.UI 
Imports Autodesk.Revit.Attributes 
Imports System.Windows.Media.Imaging Imports System.Reflection 


''' <summary> 
''' Main Ribbon Creation 
''' </summary> 
<Transaction(TransactionMode.Automatic)> _ 
<Regeneration(RegenerationOption.Manual)> _
Public Class AppExample 

    Implements IExternalApplication 

    Public Sub AddRibbonPanel(ByVal a As UIControlledApplication) 
        ' This 'myPath' variable is the trick to getting the dual debug/execution behavior!!!!!!! 
        Dim myPath As String = Assembly.GetExecutingAssembly.Location.Substring( _ 
            0, (Assembly.GetExecutingAssembly.Location.LastIndexOf("\") + 1)) 
        Dim rvtPanel As RibbonPanel = a.CreateRibbonPanel("RevitNet Customizations") 
        ' DatabaseLink ; example dll - notice the variable path to the DLL????????????? 'myPath' 
        Dim pbdDatabaseLink As New PushButtonData("Database Link", _ 
            "Database" & vbCr & "Link", _ 
            myPath & "RevitNet.DatabaseLink.dll", _ 
            "RevitNet.DatabaseLink.cmdDatabaseLink") 
        pbdDatabaseLink.Image = New BitmapImage(New Uri(myPath & "RevitNet.DatabaseLink_16.jpg")) 
        pbdDatabaseLink.LargeImage = New BitmapImage(New Uri(myPath & "RevitNet.DatabaseLink_32.jpg")) 
        pbdDatabaseLink.ToolTip = "Bidirectional Link to a Database" & vbCr & "From Revit 2011" 
        ' Add the pushbutton to the ribbon panel 
        Dim myButtonDBL As PushButton = rvtPanel.AddItem(pbdDatabaseLink) 
    End Sub 

    Public Function OnStartup(ByVal a As UIControlledApplication) _ 
    As Result Implements IExternalApplication.OnStartup 
        Try 
            AddRibbonPanel(a) 
            Return Result.Succeeded 
        Catch ex As Exception 
            Return Result.Failed 
        End Try 
    End Function 

    Public Function OnShutdown(ByVal a As UIControlledApplication) _ 
        As Result Implements IExternalApplication.OnShutdown 
        Return Result.Succeeded 
    End Function 

End Class

'*************************** ; end of VB.NET

The sample manifest file would look like:


<?xml version="1.0" encoding="utf-8" standalone="no"?> 
<RevitAddIns> 
   <AddIn Type="Application"> 
      <Name>RevitNet Utilities</Name> 
      <Assembly>RevitNet.AppExample.dll</Assembly> 
      <AddInId>2c372fa8-86c5-49f6-ae7b-fcc18481c841</AddInId> 
      <FullClassName>RevitNet.AppExample</FullClassName> 
   </AddIn> 
</RevitAddIns>

'*************************** ; end of XML Manifest File

Notice there is no file path in the 'Assembly' tag?!?!?!?!

Sunday, June 13, 2010

Autodesk AEC DevCamp

Well, I can't think of a better topic for my first post here, I just returned from Autodesk DevCamp in Boston. It was interesting discussing all of the new features of the Revit API with the guys at Autodesk that are the actual people developing the API's. It was also interesting meeting Michael Priestman who mans the Navisworks API development for Autodesk.

I think I've got all the technical information I need to turn my Revit scripting app into reality. Stay tuned for some posts where I'll share how I get it done.