Friday, July 27, 2012

CASE Revit 2013 API Workshop

It's time to make this official! We have dates and pricing ready for you guys and you can book a spot today! All computers and software will be provided so all you need to bring is excitement and a willingness to learn.


This workshop is also where I will be unveiling our subscription tools and giving away a few free 90 day trial memberships! You wont want to miss this because the general public will not be able to access these tools until November!

When:
The workshop will run four days from Monday September 11th to the 14th. Workshop days will begin at 9am and finish at 4pm with a one hour break at noon. You will be building all kinds of useful tools that you can take with you!

  • Day 1 - (Tuesday Sep. 11) Introduction to .NET and Concepts
  • Day 2 - Introduction to Revit API
  • Day 3 - Data
  • Day 4 - Elements and Geometry

Where (The New CASE Office):
401 Broadway, Suite 1600 (16th floor)
New York, New York
Map: http://bit.ly/N1PteT


Pricing!
We are offering an early bird discount that will gradually increase as we get closer. Act fast because spots are limited!
$1,500 until Friday August 3rd, 2012
$1,700 (Aug 4 - Aug 17)
$1,850 (Aug 18 - Aug 31)
$2,000 After Aug 31

Booking a Spot
Send an email to [info at case-inc dot com] and copy myself [d dot rudder at case-inc dot com] with a title of "CASE Revit 2013 API Workshop" letting us know you are interested in reserving a seat for the API workshop. Please include a phone number and we will contact you to secure payment. Your price will lock in on the date your email is sent to us if we do not get back to you the same day (highly unlikely).

Thanks for your interest and we're looking forward to helping you get your Revit API learn on!


Wednesday, July 25, 2012

CASE Add-Ins Manager is Here

Some of you may be more excited than others about this announcement... we at CASE are moving away from individual installers for our free tools. Instead we are offering a single desktop utility (no admin privileges required to install) that you can use to install and discover new tools that we offer.

http://apps.case-inc.com/content/add-manager


You may also notice a grayed out button referring to some kind of subscription... stay tuned for announcement relating to this as we will begin offering our high-powered tools to the general public via monthly or annual subscription...

Oh, and we have the August free tool ready to install using this new Add-In Manager, take a look at what Nathan Miller developed (this one was not my doing):
http://apps.case-inc.com/content/import-opennurbs-3dm-file-data

Friday, July 6, 2012

Free CASE Add-In Updates 2013 Change and Replace Linestyles

I just posted a 2013 installer for the free CASE Change and Replace Linestyles tool. You can download both the 2012 and 2013 version from the link below!

http://apps.case-inc.com/content/change-and-replace-line-styles

Tuesday, July 3, 2012

Hands on Revit API Training Workshops

Updated July 6, 2012!


I've got some good news for those of you interested in learning the Revit API. I will be conducting a series of hands-on workshops at the CASE office in New York (401 Broadway). These workshops will max out at ten (10) attendees. You will leave this workshop capable of developing your own add-ins.

Content will be tailored for beginner programmers that have familiarity with Revit. If you are a designer or support designers and have some sort need to learn BIM automation, this workshop is for you.

MacBook Airs loaded with all necessary software will be provided for your use during the workshops... just show up and be ready to learn!


View


Hardware
MacBook Airs
.NET

When?

Look for an official announcement later this month with the first workshop being held some time in August.

Length of Workshop?

We anticipate the workshop running 4 days with each session day running six hours with an hour long break in the middle (9am to 4pm).

Talent Assumptions / Prerequisites

  • Attendees will have basic knowledge of the Revit platform
  • Attendees have at least hear of the Revit API and have heard of the Microsoft .NET Framework

Programming Languages Used in Workshop

  • C# and VB.NET

Cost?

The cost for the workshops is yet to be determined. Stay tuned for announcements from the www.case-inc.com site.

Want to Reserve a Spot Now?

  • Leave a comment at the bottom with your name
  • DM or @ me on Twitter: AYBABTM

Tuesday, May 29, 2012

The Status of Revit 101

I haven't forgotten about you guys!

I will be posting more on this topic soon, but I have to be careful with what I write about mainly due to the fact that I am now under contract to write a book on customizing Autodesk Revit 2013 with .NET. As I complete chapters for the book, I will elaborate more on some of the topics here so that the book and these entries will compliment each other resulting in 37% more awesome.


The book should drop before September sometime if everything goes according to plan... Look for some Twitter hosted trivia to win free copies after it get's published.

Friday, April 27, 2012

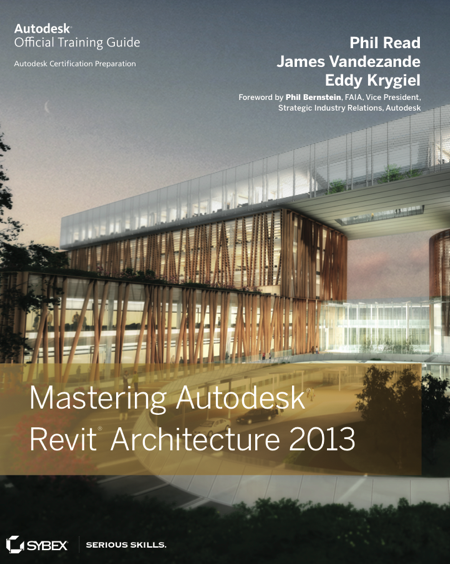
Mastering Autodesk Revit Architecture 2013

If you haven't made it over to Amazon to preorder your copy of the official Autodesk Revit Architecture 2013 training guide entitled "Mastering Autodesk Revit Architecture 2013" then you better go do it now...


This was my third year writing the API chapter with Phil Read, James Vandezande, and Eddy Krygiel. I wrote about the "Extrude Rooms to 3D Mass" sample that everyone seems to love so much. This sample was first released on the Case Design, Inc. free Revit Add-ins page. Now you have the opportunity to see the code and get an in-depth glimpse as to how this API sample works.

You can access the official API Sample exactly as it was used in the chapter from the main Sybex website. I will also be posting the sample to github (after the book officially publishes) where we can make updates if we need to. The sample was written in VB.NET, but a C# version may eventually get pushed into the github repo as well.

Wednesday, April 25, 2012

Revit API 101.2

The topic for this post will be centered on the .addin manifest file and how Add-Ins get loaded into the Revit session. The schema or file organization of the .addin file format will be discussed at first and then I'll explain a little bit about the options you have for configuring the manifest file up so that it loads the resources necessary for your tool to run automatically during debug.

Sorry if you've been hoping for a video, but this kind of information is best absorbed through good old fashioned black and white. And as far as language examples, these concepts are virtually identical between C# and VB.NET.

What is the .addin Manifest File?

For those of you that have experience using Revit Add-Ins in versions prior to Revit 2010, you may remember the old cryptic method of loading an Add-In by editing the Revit.ini file. The old Revit.ini method of loading Add-Ins into Revit is now obsolete and replaced by what is referred to as a manifest file. Manifest files are XML formatted ASCII files that tell Revit where the Add-In resources are and what class that the required IExternalApplication, IExternalCommand, or IExternalDBApplication interface has been implemented so that Revit can load the necessary commands and functionality into the session.

Revit searches for .addin files in two locations. The directory paths shown here are for Windows 7. Replace the YYYY in the paths below to match your Revit 2010 or higher installation versions (2010, 2011, 2012, 2013, etc.).

Constant for all users on the machine (may require admin permissions to modify)
  • C:\ProgramData\Autodesk\Revit\Addins\YYYY
Current user logged into Windows only (does not require admin permissions to modify)
  • %USERPROFILE%\AppData\Roaming\Autodesk\Revit\Addins\YYYY

Required Manifest Tags

There are slightly different requirements between command and application load manifests and quite a few optional tags that you can utilize in your .addin manifest files. This section will focus on the required tags. First I'll outline the required tags that are consistent for both application and command loading manifests and then the one tag specific to application load sequences.

Assembly (Required all All)
This tag is required for all kinds of applications and commands. It must contain the full file name to your DLL file. It is only required to contain a full path to the DLL if the DLL does not exist within the same directory as the .addin file. Relative pathing is supported by entering ".\" before the file path and or name so long as the directory is located beneath the same directory that the .addin file resides.

ClientId (Required for All)
A complete and fully qualified global unique identifier is required in this tag. This GUID needs to be unique across all other application or command ClientId's loaded in your session.

FullClassName (Required for All)
This is where you would enter the namespace(s) followed by the class name that contains the command or application interface that you want to execute or load. This tag should never have any spaces contained in it.

VendorId (Required for All Revit 2012 and Higher)
The four digit registered developer ID that can be obtained from the ADN site to identify the developer.

VendorDescription (Required for All Revit 2012 and Higher)
An explanation or description for the developer. It is common to list the company name and or the web address to a support site that relates to the tool.

Name (Applications Only)
A unique name for the application.

A Sample Manifest File

As you can see in the sample .addin file below, it is possible to nest multiple command and applications load sequences into a common .addin file. A sample application load sequence is loaded first with a command after it. The important thing to remember when combining multiple command or application loads is that they are all nested inside a single "RevitAddIns" tag.

<?xml version="1.0" encoding="utf-8"?>
<RevitAddIns>
  <AddIn Type="Application">
    <Name>Application Name</Name>
    <Assembly>Namespace.dll</Assembly>
    <ClientId>4ea76ff3-bba7-4969-9371-c7a3eb8ac0a8</ClientId>
    <FullClassName>Namespace.Class</FullClassName>
    <VendorId>XXXX</VendorId>
    <VendorDescription>Something about the developer, Link</VendorDescription>
  </AddIn>
  <AddIn Type="Command">
    <Text>My Command Name</Text>
    <Description>Example Command Description</Description>
    <Assembly>Namespace.dll</Assembly>
    <FullClassName>Namespace.CommandClass</FullClassName>
    <ClientId>9db2c58d-33f2-4ad1-8932-329dd83a4d0a</ClientId>
    <VendorId>XXXX</VendorId>
    <VendorDescription>Something about the developer, Link</VendorDescription>
  </AddIn>
</RevitAddIns>

Automatic Copying of a Solution Manifest to Install on Debug

You can have your .addin manifest copied to your .addins load directory automatically while debugging in Visual Studio by setting a post build event. This requires that your .addin file exist in the root of your project and included within your project's solution. An example on where and how to enter this to work on a Visual Basic .NET example is shown below.


Note: If you left out a file path to your assembly (file name only), you will be able to debug from your debug directory location during debug mode as well as run the main DLL in your Add-In load directory using the same manifest file. You will need to adjust command below to match the Revit version year and .addin file name as required. Just remember, you will need to include your .addin file withini your Visual Studio solution for this trick to work.


copy "$(ProjectDir)MyAddinFile.addin"
"$(AppData)\Autodesk\REVIT\Addins\2012\MyAddinFile.addin"

Tuesday, April 24, 2012

CASE Monthly Free Add-In for May

As most of you are aware, CASE offers a free Revit Add-In every month for you guys to play with. We post the installers on http://apps.case-inc.com/. We only require that you please register in order to gain access to the installers.

These installers require that you paste the provided installation link into Internet Explorer. No other browser will properly install the tool as we use Microsoft ClickOnce technology to handle the installers so you don't have to have Administrative permissions to do so. Since Revit requires Internet Explorer to function as well, this shouldn't be too tough of a requirement for you guys to meet.

Month of May Free Add-In - External Wall Facing Direction

The free Add-In for May (Revit 2012) originates from a request that came in from @ElrondBurrell via Twitter land. He wanted a tool that could report the directionality of all out facing external walls, so that's what this tool does. We might post an update eventually that includes windows and doors, but for now it only works on walls who's Function parameter is set to External.


The parameter selections listed in the top right offer a means to push the data into the selected parameter for each wall element. Be careful with this one as it will overwrite the data in that parameter for all walls as soon as you hit OK. Don't worry though, you can always undo if you need to.

If you choose to write the data out as an Angle, the angles start at North as 0 and go clockwise around up to 360.

Watch for the Twitter announcement at or around May 1 for the public release of this tool as well as future tools that we offer from your friends at @case_inc.

Thursday, April 19, 2012

Revit API 101.1

This is yet another installment of the ongoing Revit API 101 installment that can be viewed in numeric order from 101.#. Each are free so long as you agree to buy the writer a beer when you next see him: @AYBABTM (Austin, TX or next conference/gathering). While some basic understanding of .NET terminology and understanding is assumed in these posts, you'll do just fine if you follow the images and explanations.

I'll attempt to keep the posts slim and to the point, so if you have questions, please post them in the comments. Just remember, there's no crying in .NET.

The Revit API Namespaces

There are two DLL references that make up the entire Revit API, only one of which is required for all Revit API projects.

  • RevitAPI.dll                     (required for all Revit API projects)
  • RevitAPIUI.dll                 (required to access the application user interface objects)

The Required Transaction Attribute for All Revit API Class Implementations

There is now only one required API attribute implementation required for all Revit API implementations. The TransactionMode attribute needs to always be set immediately above the main class declaration as shown below. The TransactionMode attribute informs the Revit API as to how the pass or fail is handled for any given attempt to make changes to a Revit document using the Revit API. There are three settings for the TransactionMode attribute. The Automatic option is soon to be Obsolete, so that really only leaves two valid settings to chose from. The read-only setting is just that, so if you need to make changes to a model document, you should set your transaction attribute to Manual. We'll get into how to build and manage transactions in a future post.


The Revit API Implementations (3)

There are three ways to gain access to the .NET Revit API customization environment. The IExternalcommand implementation is by far the most common and will be discussed in our first real code example. The IExternalApplication interface is the second type and is used either to gain access to the IExternalCommand functions or events (document or application). The third and less common implementation is the IExternalDBApplication implementation which is similar to the IExternalCommand interface except that it cannot access any of the RevitAPIUI.dll namespaces.


The sample API Templates demonstrate implementations of the IExternalCommand interface in the Command class as well as the IExternalApplication interface in the Application class. The IExternalDBApplication class is similar to the IExternalApplication class except for minor differences as shown below.

Sample IExternalCommand Interface


Imports Autodesk.Revit.ApplicationServices
Imports Autodesk.Revit.Attributes
Imports Autodesk.Revit.DB
Imports Autodesk.Revit.UI
Imports Autodesk.Revit.UI.Selection

''' <summary>
''' Revit 2013 Command Class 
''' </summary>
''' <remarks></remarks>
<Transaction(TransactionMode.Manual)>
Public Class Command

    Implements IExternalCommand

    ''' <summary>
    ''' Command Entry Point
    ''' </summary>
    ''' <param name="commandData">Input argument providing access to the Revit application and documents</param>
    ''' <param name="message">Return message to the user in case of error or cancel</param>
    ''' <param name="elements">Access elements</param>
    ''' <returns>Cancelled, Failed or Succeeded</returns>
    Public Function Execute(ByVal commandData As ExternalCommandData,
                            ByRef message As String,
                            ByVal elements As ElementSet) As Result Implements IExternalCommand.Execute
        Try
            ' Add Your Code Here

            ' Return Success
            Return Result.Succeeded

        Catch ex As Exception

            ' Failure Message
            message = ex.Message
            Return Result.Failed

        End Try

    End Function
End Class

Sample IExternalApplication Interface


Imports Autodesk.Revit.ApplicationServices
Imports Autodesk.Revit.Attributes
Imports Autodesk.Revit.DB
Imports Autodesk.Revit.UI
Imports Autodesk.Revit.UI.Selection

''' <summary>
''' Revit 2013 API Application Class
''' </summary>
''' <remarks></remarks>
<Transaction(TransactionMode.Manual)> 
Class Application

    Implements IExternalApplication

    ''' <summary>
    ''' Fires off when Revit Session Starts
    ''' </summary>
    ''' <param name="application">The UI controlled application</param>
    ''' <returns>Returned status</returns>
    Public Function OnStartup(ByVal application As UIControlledApplication) _
            As Result Implements IExternalApplication.OnStartup

        Try

            ' Add your code here

            ' Return Success
            Return Result.Succeeded

        Catch ex As Exception

            ' Return Failure
            Return Result.Failed

        End Try

    End Function

    ''' <summary>
    ''' Fires off when Revit Session Ends
    ''' </summary>
    ''' <param name="application">The UI controlled application.</param>
    ''' <returns>Returned status</returns>
    Public Function OnShutdown(ByVal application As UIControlledApplication) _
            As Result Implements IExternalApplication.OnShutdown

        ' Return Success
        Return Result.Succeeded

    End Function

End Class

Sample IExternalDBApplication Interface


Imports Autodesk.Revit.ApplicationServices
Imports Autodesk.Revit.Attributes
Imports Autodesk.Revit.DB
Imports Autodesk.Revit.UI
Imports Autodesk.Revit.UI.Selection

''' <summary>
''' Revit 2013 API DBApplication Class
''' </summary>
''' <remarks></remarks>
<Transaction(TransactionMode.Manual)>
Public Class DBApplication

    Implements IExternalDBApplication

    ''' <summary>
    ''' DB Application Shutdown
    ''' </summary>
    ''' <param name="application">The controlled application</param>
    ''' <returns>Returned status</returns>
    ''' <remarks></remarks>
    Public Function OnShutdown(application As ControlledApplication) _
            As ExternalDBApplicationResult Implements IExternalDBApplication.OnShutdown

        ' Return Success
        Return Result.Succeeded

    End Function

    ''' <summary>
    ''' DB Application Startup
    ''' </summary>
    ''' <param name="application">The controlled application</param>
    ''' <returns>Returned status</returns>
    ''' <remarks></remarks>
    Public Function OnStartup(application As ControlledApplication) _
            As ExternalDBApplicationResult Implements IExternalDBApplication.OnStartup

        Try

            ' Add your code here

            ' Return Success
            Return Result.Succeeded

        Catch ex As Exception

            ' Return Failure
            Return Result.Failed

        End Try

    End Function

End Class

Tuesday, April 17, 2012

Revit API Training 101.01

I've been getting lots of requests from folks to post a "Getting Started with the Revit API" or "Revit API 101" series, so here is the introduction to such a series! I better see lots of views on these posts! Don't let me down.

Sample Code on GitHub

I've setup a git repository for you guys to download the source code for the samples (as they become available). Revit API 101 Samples on GitHub: http://github.com/rudderdon/Revit101 .

Introduction

This is the first of what might be an endless series on how to get going with the Revit API. Since Revit 2013 just came out, these topics will focus on 2013. If Revit 2012 is all that you have installed, don't worry. The Revit 2012 and 2013 API's differ only slightly and I'll do my best to point out what is different between the two versions in my posts as we run into those differences.


Getting Started, the Development Environment

The first thing that I would recommend for someone that is bran spanking new at programming altogether would be to download and install an Integrated Development Environment (IDE) suitable for .NET development. The Application Programming Interface (API) for Revit is based on the Microsoft .NET Framework 4.0. There are several free IDE platforms out there that you can use, but if you have access to or can afford it, I recommend Microsoft Visual Studio Professional (VS). The latest official versions of VS at the time of this post is VS 2010. There is a free BETA version for 2011 out that you can use, but it will stop working later in the summer of 2012 unless you purchase a license.

Download and Purchase VS 2010 Professional
Download VS 2011 BETA
Download VS 2010 Express Versions (FREE)

Other non Microsoft Sanctioned .NET IDE's
SharpDevelop (Free)
MonoDevelop

Download and Explore the Revit SDK

The Software Development Kit for Revit contains several samples as well as key documentation that can keep you moving in the right direction. The 2012 SDK has a lot more samples than the 2013 version, but you can download either from the Autodesk Revit website. You can also read through Autodesk's tutorial entitled "My First Revit Plug-in."


The next post will cover the Revit API implementations and how they work. We will also have our first sample piece of code to work with.

Friday, April 6, 2012

Revit 2013 Visual Studio 2010 Template

For those of you that also write Add-Ins for Revit, I went ahead and posted an updated template for Autodesk Revit Architecture 2013. I've included links to a VB.NET and C# template below.
Installing VB.NET
Copy this zip file as-is (do not unzip it) into a directory beneath
"%USERPROFILE%\Documents\Visual Studio 2010\Templates\ProjectTemplates\Visual Basic" 

Installing C#
Copy this zip file as-is (do not unzip it) into a directory beneath
"%USERPROFILE%\Documents\Visual Studio 2010\Templates\ProjectTemplates\Visual C#" 

The next time you launch Visual Studio 2010, you will notice a new project template named "Revit Architecture 2013 Template" in the directory's name you placed it under kinda like what you see below.


Wednesday, April 4, 2012

Revit API 101 - Coming Soon

I've been getting lots of requests for a Revit 101 (maybe 201 and beyond as well) course... I am going to make this happen because I care! You will get the (almost) one on one experience except through the internet and maybe twitter :) dot dot dot

Stay tuned for a series of links to free learning resources if not links to additional resources on this blog to get what you deserve (Revit API learning'). I need to figure out the best way to deliver. Maybe videos and such, but definitely an insane amount of tips, etc.

But first enjoy some killer architecture: http://archinect.com/blog/article/43505385/architectural-lolcats (there will be a quiz)

Wednesday, March 28, 2012

Vasari SDK Sample 8 - PlaceFamilesByXyzFromFile

Sample #8 of the new Vasari SDK samples is PlaceFamilesByXyzFromFile. The SDK sample contains code in  both VB.NET and C#.

This sample places a family instance at the location specified in an external file. The file is a tab delimited text file with containing a row for each family instance to be placed in the model. A chess board setup is the topic of this one.

Before


After


Monday, March 26, 2012

Vasari SDK Sample 7 - ExportElementXYZtoTextFile


Sample #7 of the new Vasari SDK samples is ExportElementXYZtoTextFile. The SDK sample contains code in  both VB.NET and C#.

This is a simple sample that can export XYZ coordinates for a selected category. Another sweet feature within this sample is the ability to also filter by Design Option. Filtering by Design Option can be tricky of you've never had to do it before. This sample can be run on any ol file you want.


The codes used to filter b category and design option is quite simple. An option in the API exists for you to filter by ContainedInDesignOption as shown below in a short snippet.


        ' Filter by the Category Selected - by Category Name
        Dim m_col As New FilteredElementCollector(_doc)
        m_col.OfCategory(_doc.Settings.Categories.Item(Me.ComboBoxCategory.SelectedItem.ToString).Id.IntegerValue)
        m_col.WhereElementIsNotElementType()

        ' Get the selected item as an object
        Dim m_desOpt As clsDesignOption = Me.ComboBoxDesignOption.SelectedItem

        ' Do we have a Design Option Filter?
        If Not m_desOpt.DesignOption Is Nothing Then

            ' Apply the Option Set ID to the Filter
            m_col.ContainedInDesignOption(m_desOpt.DesignOption.Id)

        End If

The element processing to get the element XYZ is fairly simple as well. This is a very basic implementation that doesn't take into account any corrections for offsets or hosting.


        ' Process the Elements
        For Each x As Element In m_col.ToElements

            Try

                ' Get the XYZ Location
                Dim m_location As Location = x.Location

                ' Continue if we have a location
                If Not m_location Is Nothing Then

                    ' Get the XYZ object
                    Dim m_xyz As XYZ = DirectCast(m_location, LocationPoint).Point

                    ' Design Option Data
                    Dim m_dopt As String = ""
                    Dim m_set As String = ""
                    If Not x.DesignOption Is Nothing Then
                        m_dopt = x.DesignOption.Name
                        ' Cast the Object to a Design Option Object
                        Dim mm_DesignOption = TryCast(x.DesignOption, DesignOption)
                        ' Get the Set Name
                        m_set = _doc.Element(New ElementId(mm_DesignOption.Parameter(BuiltInParameter.OPTION_SET_ID).AsElementId.IntegerValue)).Name
                    End If

                    ' Write out the Element Data
                    Dim m_line As New List(Of String)

                    With m_line
                        .Add(x.Id.ToString)
                        .Add(x.Name)
                        .Add(x.Category.Name)
                        .Add(m_set)
                        .Add(m_dopt)
                        .Add(m_xyz.X.ToString)
                        .Add(m_xyz.Y.ToString)
                        .Add(m_xyz.Z.ToString)
                    End With

                    m_fs.WriteLine(m_line)

                End If

            Catch ex As Exception

            End Try

        Next

Friday, March 23, 2012

Vasari SDK Sample 6 - ExtrudeRoomsToMass


Sample #6 of the new Vasari SDK samples is ExtrudeRoomsToMass. The SDK sample contains code in  both VB.NET and C#.

This is a sample that demonstrates how to read the boundaries of a room element and extrude a form using these coordinates. Each room results in a new family creation that gets loaded into the model with a material generated for the department name. The material color is completely randomized.

A sample model containing a few room contained only by a series of room separation lines named "ExtrudeRoomsToMass.rvt" is provided along with the sample.


If you want to see the code samples for this one, you'll just have to get the Vasari SDK from
matt dot jezyk at autodesk dot com!

Wednesday, March 21, 2012

Vasari SDK Sample 5 - FormulaDrivenCurves


Sample #5 of the new Vasari SDK samples is FormulaDrivenCurves. The SDK sample contains code in  both VB.NET and C#.

This might be my favorite sample out of the Vasari SDK. This sample needs to be run from inside a fresh conceptual mass family. It takes a while to run, but it basically reads through a set of formulas describing a somewhat complex shape and lofts a series of surfaces to generate what looks a lot like a piece of pasta!


The formula steps through a series of i (cnTi) and j (cnTj) ranges to generate the reference points that are then used to generate a series of curves. The curves then get lofted around the object. The equation is shown here.


                    ' Equation                     
                    m_x = 10 * ((0.7 + 0.2 * Math.Sin((21 * cnTj / 250) * Math.PI)) * Math.Cos((cnTi / 20) * Math.PI))
                    m_y = 10 * ((0.7 + 0.2 * Math.Sin((21 * cnTj / 250) * Math.PI)) * Math.Sin((-cnTi / 20) * Math.PI))
                    m_z = 10 * (39 * cnTi / 1000 + 1.5 * Math.Sin((cnTj / 50) * Math.PI))


The complete Vasari SDK can be shared from our buddy Matt dot Jezyk at Autodesk dot com

Tuesday, March 20, 2012

Vasari SDK Sample 4 - MassColorGrossFloorArea

Sample #4 of the new Vasari SDK samples is MassColorGrossFloorArea. The SDK sample contains code in  both VB.NET and C#.

This is a rather interesting sample that implements IUpdater. This sample requires no command execution to update the materialism on a set of masses based on their relative closeness to a target Gross Floor Area (GFA). As the mass dimensions or applied mass floors are adjusting resulting in an updated GFA, the colors aromatically adjust to yellow if their GFA is under the allowable value for "Max Underage Gross Floor Area", red if over the "Max Overage Gross Floor Area", and green if within the allowable tolerance of the "Target Gross Floor Area" parameter. each of these parameters are type parameters within the mass family.

Here is a snapshot of the masses before they have been adjusted to be all within the GFA target.


Here is the masses all green after their dimensions have been adjusted to target their "Target Gross Floor Area" values.


Monday, March 19, 2012

Vasari SDK Sample 3 - Incrementer

Sample #3 of the new Vasari SDK samples is Incrementer. The SDK sample contains code in  both VB.NET and C#.

Have you ever checked out some of the awesome "incremental" formula based families that Zach Kron has built and blogged about on  http://buildz.blogspot.com/?


This sample helps construct a series of copied families all while incrementally filling in a numerical value within a specified integer parameter in the family. So basically you can take a series of families with formulas using this incremental value from this:


To this:


Friday, March 16, 2012

Vasari SDK Sample 2 - DividedSurfacePanelRandomizer


Sample #2 of the new Vasari SDK samples is DividedSurfacePanelRandomizer. The SDK sample contains code in  both VB.NET and C#.

This is another short and sweet sample demonstrating how to randomize panels instantiated within a Divided Surface pattern. This sample needs to be run from within a family (rfa) file for an element who's face(s) have a Divided Surface and are populated with a panel based pattern family. A family file named "DividedSurfacePanelRandomizer.rfa" has been provided with the SDK to use for this sample.


This sample is provided with a modeless user form that prompts you to select a panel element from within a Divided Surface. Once you've selected a panel, the form loads all pattern families within the family that are of the same form pattern shape. These types are what will be randomized across the Divided Surface.

The code that handles the randomization is fairly straightforward. The .NET class "Random" used to generate a random number between 1 and the total qualifying panel families based on your original selection and uses that integer to identify the corresponding panel family symbol to apply in that instance.


        ' New Transaction
        Dim m_t As New Transaction(_doc, "Vasari SDK - Panel Randomization")
        m_t.Start()

        Try

            ' Get all Panels of Matching Type
            Dim m_filter As New FilteredElementCollector(_doc)
            m_filter.WhereElementIsNotElementType()
            m_filter.OfCategory(BuiltInCategory.OST_CurtainWallPanels)
            Dim m_panels As New List(Of Element)
            m_panels = m_filter.ToElements

            ' Random Object
            Dim m_r As New Random

            ' Prime Progressbar
            With Me.ProgressBar1
                .Minimum = 0
                .Maximum = m_panels.Count
                .Value = 0
            End With

            ' Randomize their types
            For Each x As Element In m_panels

                ' Step the progressbar
                Me.ProgressBar1.Increment(1)

                ' Ignore non Panel Elements
                If Not TypeOf x Is Panel Then Continue For

                Try

                    ' Only Work with Panes of Qualifying Type
                    If _Panels.ContainsValue(x.GetTypeId) Then

                        ' Randomize Instance
                        Try

                            ' Random Number between 1 and Quantity of Qualifying Panel Types
                            Dim m_i As Integer = m_r.Next(1, _Panels.Count)

                            ' Change the Type to the Matching Dictionary Entry for the Random Number Key
                            Dim m_eid As ElementId = Nothing
                            _Panels.TryGetValue(m_i, m_eid)

                            ' Was the Type Value Found?
                            If Not m_eid Is Nothing Then

                                ' Change the Type ID
                                x.ChangeTypeId(m_eid)

                            End If

                        Catch ex2 As Exception

                        End Try

                    End If

                Catch ex1 As Exception

                End Try

            Next

            ' Finalize the Transaction
            m_t.Commit()

        Catch ex As Exception

            ' Rollback on failure
            m_t.RollBack()

        End Try

You can click randomize as many times as you want until you get the desired randomization.


Thursday, March 15, 2012

Vasari SDK Sample 1 - DividedSurfacePanelNumbering

Sample #1 of the new Vasari SDK samples is DividedSurfacePanelNumbering. The SDK sample contains code in  both VB.NET and C#.

This is a short and sweet sample demonstrating how to read the column and row numbers for panels instantiated within a Divided Surface pattern. This sample needs to be run from within a family (rfa) file for an element who's face(s) have a Divided Surface and are populated with a panel based pattern family. A family file named "DividedSurfacePanelNumbering.rfa" has been provided with the SDK to use for this sample.


The first task at hand is to get the document object and attain the list of Divided Surface elements in the family. This is also a good place to initiate the required transaction.


            ' The Document
            Dim m_doc As Document = commandData.Application.ActiveUIDocument.Document

            ' Get the Divided Surfaces by Category
            Dim m_col As New FilteredElementCollector(m_doc)
            m_col.OfCategory(BuiltInCategory.OST_DividedSurface)
            ' Transaction
            Dim m_t As New Transaction(m_doc, "Vasari SDK - Panel Numbering")
            m_t.Start()

After we have the list of divided surface elements, we can iterate them and iterate through each of their U and V sets to get all the way down to the panel instance family. Once we have the family instance, we'll set the parameters to their grid values.
            ' Succesful Panel Renumbering Count
            Dim m_reportInt As Integer = 0

            Try

                ' Iterate the DS
                For Each x In m_col.ToElements

                    If TypeOf x Is DividedSurface Then

                        ' Cast to DS
                        Dim m_ds As DividedSurface = TryCast(x, DividedSurface)

                        ' Iterate Columns
                        For u = 1 To m_ds.NumberOfUGridlines - 1

                            ' GridNode Element
                            Dim m_gn As New GridNode

                            ' Set the U Grid
                            m_gn.UIndex = u

                            ' Iterate Rows
                            For v = 1 To m_ds.NumberOfVGridlines - 1

                                ' Set the V Grid
                                m_gn.VIndex = v

                                ' Get the Family Instance
                                Dim m_fi As FamilyInstance = m_ds.GetTileFamilyInstance(m_gn, 0)

                                If m_fi Is Nothing Then Continue For

                                ' Set the Panels's Row and Column Parameters Respectively
                                m_fi.Parameter("Panel Column").Set(u.ToString)
                                m_fi.Parameter("Panel Row").Set(v.ToString)

                                ' Step the Succes Counter
                                m_reportInt += 1

                            Next

                        Next


                    End If
                Next

                ' Commit the Transaction
                m_t.Commit()

                ' Inform the User
                Dim m_td As New TaskDialog("Panel Renumbering Stats")
                m_td.MainInstruction = m_reportInt.ToString & " Panels were succesfully renumbered!" & vbCr & "Check each panel's parameters 'Panel Column' and 'Panel Row'"
                m_td.MainContent = "These are shared parameters and can be scheduled from the 'Curtain Panel' category when loaded into a project."
                m_td.Show()

            Catch uvnumbering As Exception

                ' Rollback the transaction
                m_t.RollBack()

            End Try

            ' Success
            Return Result.Succeeded

The result will populate each panel instance within the Divided Surface pattern grid to their respective column and row values.